How to mount a 2 Inch TFT LCD Display?
Leave a message
Mounting a 2-inch TFT LCD display can be an exciting project, whether you're working on a DIY electronics device, a hobby project, or a professional application. As a trusted 2-inch TFT LCD display supplier, I'm here to guide you through the entire process, from understanding the basics to the final installation.
Understanding Your 2-Inch TFT LCD Display
Before we start the mounting process, it's essential to understand the key components and features of your 2-inch TFT LCD display. These displays are known for their high-resolution visuals, vibrant colors, and compact size, making them ideal for a wide range of applications.
The display typically consists of a liquid crystal panel, a backlight unit, and a driver board. The liquid crystal panel is responsible for displaying the images, while the backlight unit provides the necessary illumination. The driver board controls the display's operation, including image processing and signal transmission.
Tools and Materials You'll Need
To mount your 2-inch TFT LCD display successfully, you'll need the following tools and materials:
- Screwdriver Set: A set of precision screwdrivers will be necessary to remove and install screws on the display and the mounting surface.
- Soldering Iron and Solder: If your display requires soldering connections, a soldering iron and solder are essential.
- Mounting Brackets or Adhesive: Depending on your application, you may need mounting brackets or adhesive to secure the display to the surface.
- Electrical Wires and Connectors: You'll need electrical wires and connectors to connect the display to the power source and other components.
- Multimeter: A multimeter is useful for testing electrical connections and ensuring proper voltage and current.
Preparing the Mounting Surface
The first step in mounting your 2-inch TFT LCD display is to prepare the mounting surface. The surface should be clean, flat, and free of any debris or contaminants. You may need to use a cleaning solution and a lint-free cloth to clean the surface thoroughly.
If you're using mounting brackets, you'll need to drill holes in the surface according to the bracket's specifications. Make sure the holes are properly aligned and the correct size to ensure a secure fit.
Connecting the Display
Once the mounting surface is prepared, it's time to connect the display to the power source and other components. Most 2-inch TFT LCD displays require a 5V power supply, but some may require a different voltage. Make sure to check the display's datasheet for the correct power requirements.
Connect the display's power cable to the power source using the appropriate connectors. If your display requires soldering connections, you'll need to use a soldering iron and solder to connect the wires. Make sure to follow proper soldering techniques to avoid damage to the display.
Next, connect the display to the controller board or other components using the appropriate cables and connectors. Make sure the connections are secure and the cables are properly routed to avoid interference.
Mounting the Display
With the display connected, it's time to mount it to the surface. If you're using mounting brackets, place the brackets on the display and align them with the holes in the mounting surface. Use the screws to secure the brackets to the surface, making sure they are tightened securely.
If you're using adhesive, apply the adhesive to the back of the display according to the manufacturer's instructions. Place the display on the mounting surface and press it firmly to ensure a good bond. Make sure to allow the adhesive to dry completely before proceeding.
Testing the Display
Once the display is mounted, it's time to test it to ensure it's working properly. Connect the power source and turn on the display. You should see the display light up and display the default image or screen.
If the display doesn't turn on or there are any issues with the image quality, check the connections and power supply. Make sure the cables are properly connected and the power supply is providing the correct voltage. You may also need to check the display's datasheet for troubleshooting tips.
Tips and Tricks for a Successful Mounting
- Read the Datasheet: Before starting the mounting process, make sure to read the display's datasheet carefully. The datasheet contains important information about the display's specifications, power requirements, and mounting instructions.
- Use Proper Tools and Techniques: Make sure to use the proper tools and techniques when mounting the display. This will help ensure a secure and reliable installation.
- Take Your Time: Mounting a 2-inch TFT LCD display requires patience and attention to detail. Take your time and make sure each step is done correctly.
- Test the Display Frequently: Throughout the mounting process, test the display frequently to ensure it's working properly. This will help you identify and fix any issues before they become major problems.
Other TFT LCD Display Options
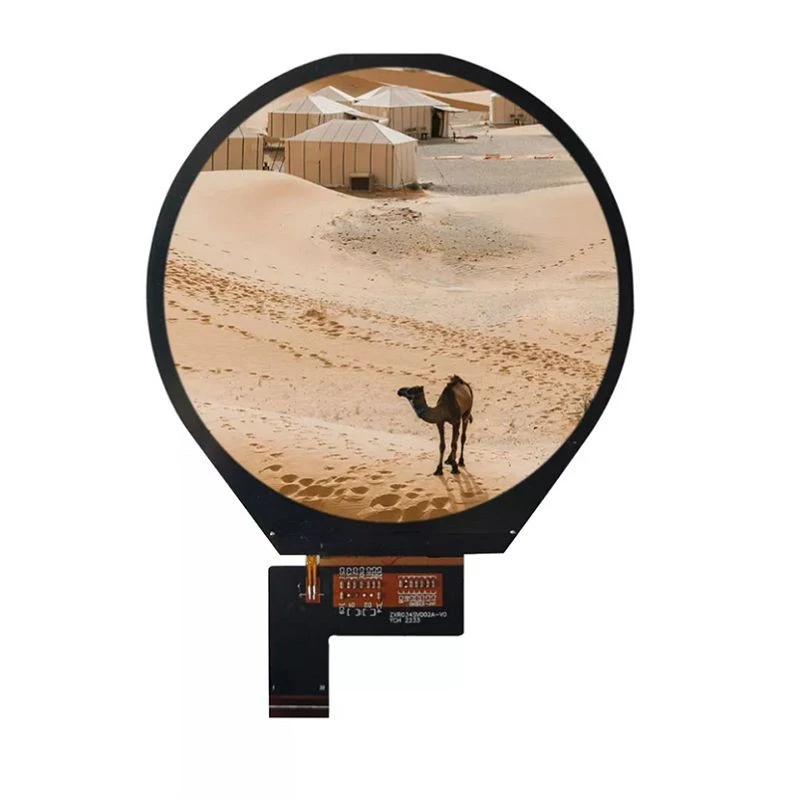
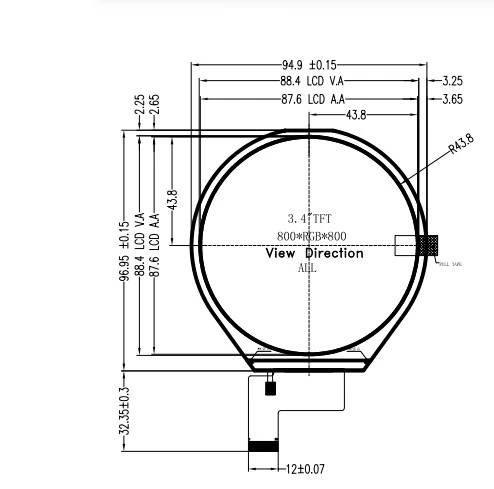
In addition to our 2-inch TFT LCD displays, we also offer a wide range of other TFT LCD displays, including 7 Inch TFT LCD Display, 3.97 Inch TFT LCD Display, and 3.4 Inch TFT LCD Display. These displays offer high-resolution visuals, vibrant colors, and a compact design, making them ideal for a variety of applications.
Contact Us for Your TFT LCD Display Needs
If you're interested in purchasing a 2-inch TFT LCD display or any other TFT LCD displays, please contact us to learn more about our products and services. Our team of experts is available to help you choose the right display for your application and provide you with the support you need to ensure a successful installation.
We look forward to working with you and helping you achieve your project goals.
References
- Manufacturer's datasheets for 2-inch TFT LCD displays
- Electronics textbooks and online resources on LCD technology and mounting techniques


